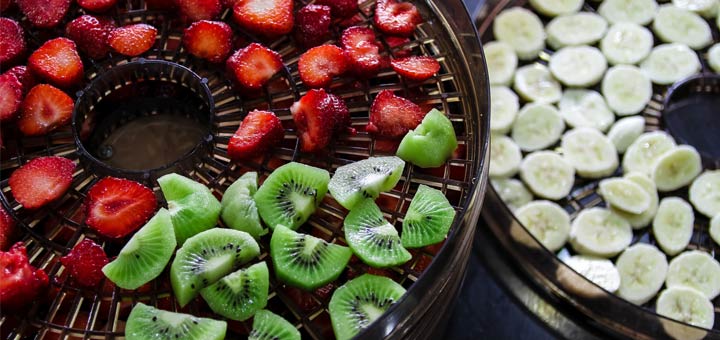
You are here to do one thing and one thing only: learn how to dehydrate your own fruit. The outrageous prices one can pay for small bags of dried fruit hurts the soul, but purchasing fresh fruit is much more affordable. Not only is it more affordable, but fresh produce is also incredibly easy to dehydrate. Buy the produce, dehydrate it, and eat it. It’s as easy as that.
Before you say that it costs more to buy a dehydrator, there are many affordable options, some of which are about $40. You could buy four packages of dried fruit for that amount! If you rely on banana chips or dried mango slices to fuel you throughout the day, it is optimal to obtain a dehydrator and learn how to use it. Just remember to get a dehydrator with several racks so that you can make dried fruit in bulk.
The great thing about the dehydrator is that you can dehydrate almost any fruit. To help you achieve greatness with your newfound love of dehydrating fruit, follow the simple steps below.
Step 1: Wash And Dry Fruit
This really needs no explanation, but if you want it…wash and then dry your fruit.
Step 2: Peel The Fruit (If Peel Isn’t Edible)
Here’s the deal: if you would eat the peel of a fruit without dehydrating it, you can leave it on. You can also peel it if you don’t want to worry about the skin. Things like mangos, bananas, and kiwis should be peeled. By the way, you don’t need to peel citrus fruit if you happen to dehydrate them.
Step 3: Slice The Fruit ¼” or ½” Thick:
With the exception of several fruits like grapes, pitted cherries, halved apricots, blueberries, or halved strawberries, most fruit should be cut about ¼” – ½” thick. Remember that the thinner each slice of fruit is, the quicker it will dehydrate.
Step 4: Spray Fruit With Lemon Juice
Prior to putting your sliced fruit into the dehydrator, it is recommended to spray the fruit slices with lemon juice. This helps to avoid browning. Put the lemon juice in a spray bottle and lightly spritz the fruit.
Step 5: Make Sure Fruit Slices Are In One Layer
The fruit slices should not be overlapping! The edges can touch, but overlapping increases the chances of uneven dehydrating and clumping. Additionally, separate the different fruits onto different dehydrator trays. Fruits that have more juice should be placed on the bottom rack in case of dripping.
Step 6: Dehydrating
Set your dehydrator on low and insert the trays of fruit. The time it takes to dehydrate will vary depending on the thickness of the slices and the type of fruit you are dehydrating.
Step 7: Take Pictures
Show all of your friends how cool you are by taking pictures of all that you dehydrated. If you make a lot, store the fruit in sealable bags or airtight containers and place them in a cool, dry place. A vacuum sealer is also a good option for preservation.

Vincent Stevens is the senior content writer at Dherbs. As a fitness and health and wellness enthusiast, he enjoys covering a variety of topics, including the latest health, fitness, beauty, and lifestyle trends. His goal is to inform people of different ways they can improve their overall health, which aligns with Dherbs’ core values. He received his bachelor’s degree in creative writing from the University of Redlands, graduating summa cum laude. He lives in Los Angeles, CA.


